


HOW TO CREATE ALMOST FREE PROFESSIONAL ECOMMERCE WEBSITE IN SIMPLE AND EASY WAY
We will help you how to create an almost free professional Ecommerce website in a simple and easy way, with the OpenCart content management system, and what is most important it’s very fast.
You don’t need to think about:
- How to find the right developer who can create your e-commerce website
- You don’t need any skills in programming, tools or plugins – it’s really easy
- You can choose from so many different FREE mobile-friendly professional templates for your website with just one click
- You will get one of most popular content management systems in the world – OpenCart
WHY OPENCART INSTEAD OF OTHER SO MANY OPTIONS?
Because OpenCart is one of the most popular content management systems concentrated in e-commerce. In a world where are so many futures already programmed for OpenCart platform, you can easily use them without any programming skills and most importantly most of them are FREE. And of course OpenCart system is very simple and easy to use.
HOW IT WORKS? WE WILL GO THROUGH 4 STEPS
- Internet address and server (domain name and hosting)
- Install a content management system(CMS) for your website
- Professionally design your new e-commerce website
- Additional useful information
1 INTERNET ADDRESS IN OTHER WORDS DOMAIN NAME AND SERVER FOR YOUR WEBSITE
An Internet address (domain) is needed so everyone can find you via your address on the Internet. For example, a youtube domain name is youtube.com and a server is needed to make your website available 24 hours a day and 7 days a week for everyone.
There are so many options for choosing a server provider for your website, but I will suggest the most stable and popular ones in the world:
Also if you want you can google to find what can offer to you other hosting providers
But in this case, I will use Hostgator.com
The only few steps that cost any money are your server, domain name, and professional design template. But without this, you cannot have your website available on the Internet. So let’s get started with hosting and domain name.
In your browser go to https://www.hostgator.com/web-hosting
If you want to create one website with only one domain name, I highly recommend you to use Hostgator “Hitchling plan”, later if you want some more options you can always upgrade to another plan. But for start it’s enough “Hitchling plan”.
If you already have a domain name you can use the “I already own this domain” section, if not “Register a new domain”
WHAT SHOULD BE MENTIONED
You can select the period for which you will receive server services “Billing Cycle”. You can select from 1 to 36 months. You will be notified before the end of the server service and you can always upgrade it.
Also, you can add Additional Services like:
*SSL Certificate – Ensures that visitor data (credit cards, passwords, etc.) is secure and protected.
*SiteLock Essentials – Protects your website by automatically downloading site data, screening it, removing malware, and uploading a clean version to restore your site.
*Professional Email – Add email, calendar, cloud storage with OneDrive, video conferencing with Microsoft Teams, and more. Powered by Microsoft Office 365.
*Site Backup – It’s insurance for your website. Get daily automated website backup for all web files and databases with a 1-click restore.
*HostGator SEO Tools – Provides you with easy-to-follow insights and analytics that help improve your search rankings, boost your website traffic, and monitor local competition.
And of course, if you have you can use a discount coupon code.
2 INSTALL A CONTENT MANAGEMENT SYSTEM FOR YOUR WEBSITE
After purchasing the server prepare the OpenCart Installation. Before we begin the installation process Download the latest version of OpenCart: https://www.opencart.com/index.php?route=cms/download
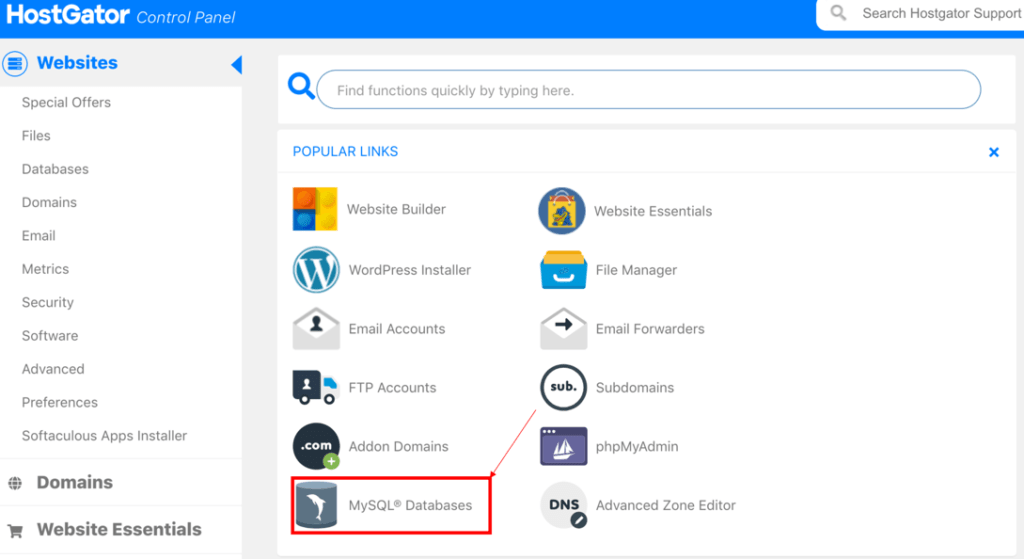
- Next, we need to create a database and user. So, log in to your “Hostgator Control Panel” and go to MySQL Database under the Database section. After filling in the required fields, press Create.

2. First you need to create a new database. The name of the database can be your website name or whatever you want, this database name later will be used for OpenCart installation, so make sure to copy it. In this case, I just use the Database name: “New”

3. Now you need to create a new user name for your database. The name can be whatever you want, in this case, I just use the name: “User” and to create a password you can use yours or generate one with “Password Generator”, name and password later will be used for OpenCart installation, so make sure to copy it.

4. Now you must add User to created Database

5. Make sure to give all database privileges to the user

IMPORTANT: Make sure to copy the MySQL and USER credentials complete with the alphanumerical strings–you will need them later.
6. Next go to your Hostgator Control Panel and in the Files section click on File Manager.

7. Click and expand the file public_html.

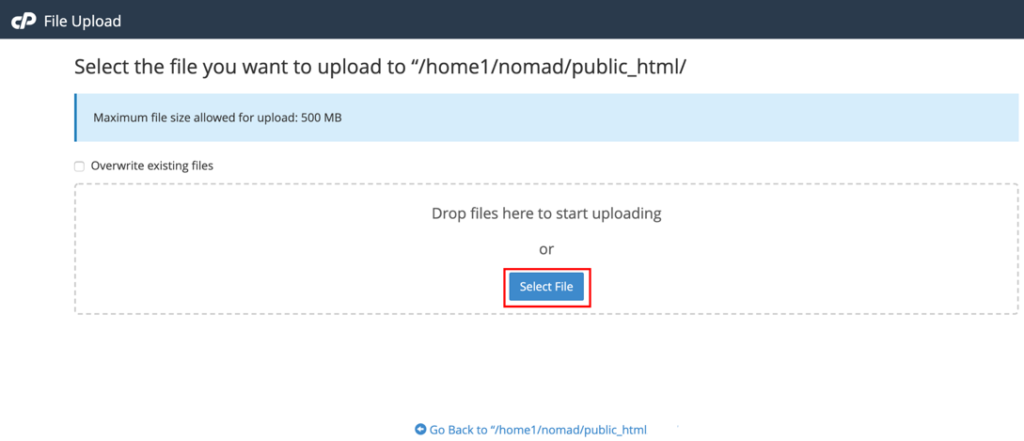
8. If in the “public_html” folder there are any files you can remove them. Choose the “Upload” file in the menu when “Select File” and choose your downloaded OpenCart file to upload to the server.


9. After uploading OpenCart to the server come back to file manager and click on the OpenCart.zip file right mouse button to “Extract” all files

10. After uploading OpenCart to the server comeback to “File Manager” and click on the OpenCart*.zip file right mouse button to “Extract” all files
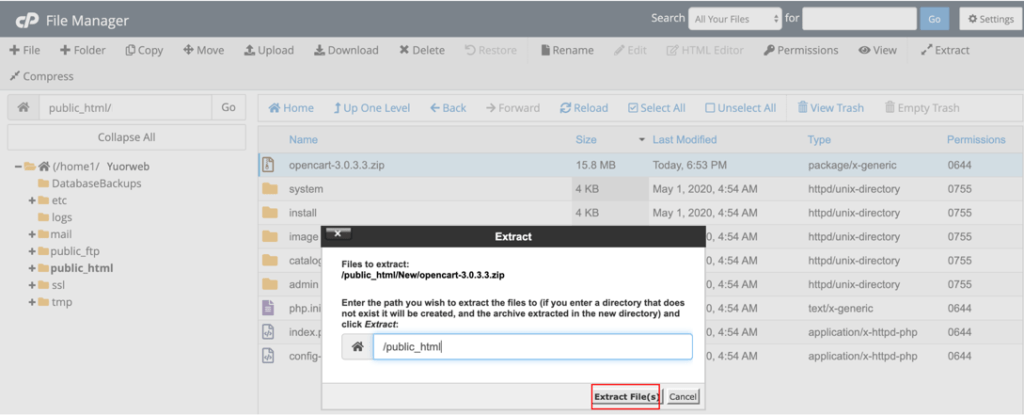
11. All files after extraction must be in the “/Public_html” folder, not in the “/Public_html/OpenCart” otherwise you cannot install the OpenCart system. Please have a look at the example below.

12. Installing OpenCart
Now that we have the preparation stage covered, we can proceed with the installation process. Open the browser (Chrome, Mozilla, or whatever you use) and access your domain name (for example: yourdomain.com) to open the setup page. The OpenCart 5-minute installation wizard only has 4 steps in total:

This page is the installation page. The following steps will help you complete the installation process for OpenCart.
12.1 License
You may read through the license, check “I agree to the license”, and press “Continue”.
12.2. Pre-Installation
This step checks to see if the web server has the technical requirements and correct permissions to set up OpenCart properly. If red marks are visible on #1 or #2, you need to make sure that these components are properly installed on the web server. You should contact your hosting service if there are any issues with this. If there are red marks on #3 or #4, there might have been an issue with uploading the files using the FTP client. If everything is configured correctly and green marks are visible (as seen below), you may press “Continue”.

12.3. Configuration
You need to fill in the spaces below #1 by adding the database connection details (username/password, database name). Make sure the database details match to the ones entered during database creation. Also, you should create a new username and password for administrative access to the OpenCart shop. When finished, you may press “Continue”.

12.4. Completing the installation
Now that the installation is complete, the “install” folder is no longer required. You should delete the “install” folder in the “Hostgator Control panel”, “file manager”, and “public_html” folders. You now have the option to browse the front end of your shop or choose to log into the administration side.

3 DESIGN YOUR NEW WEBSITE
You can just buy a professional template for your e-commerce website and you can do so with the links below:
In this case, often design provider gives you full instructions on how to install and configure the theme to your OpenCart website. Here you can find free OpenCart design themes
Free OpenCart Themes Make sure that your version of THEME matches the version of the opencart version you are installing.
Let’s install a new theme design in our OpenCart store

In this example we will use: pavothemes.com
Choose one of the design theme,s which relate to your business in this example, we will use: “PavBixone” Click to Download

Now access the admin panel of your website

Extract the theme full package you downloaded

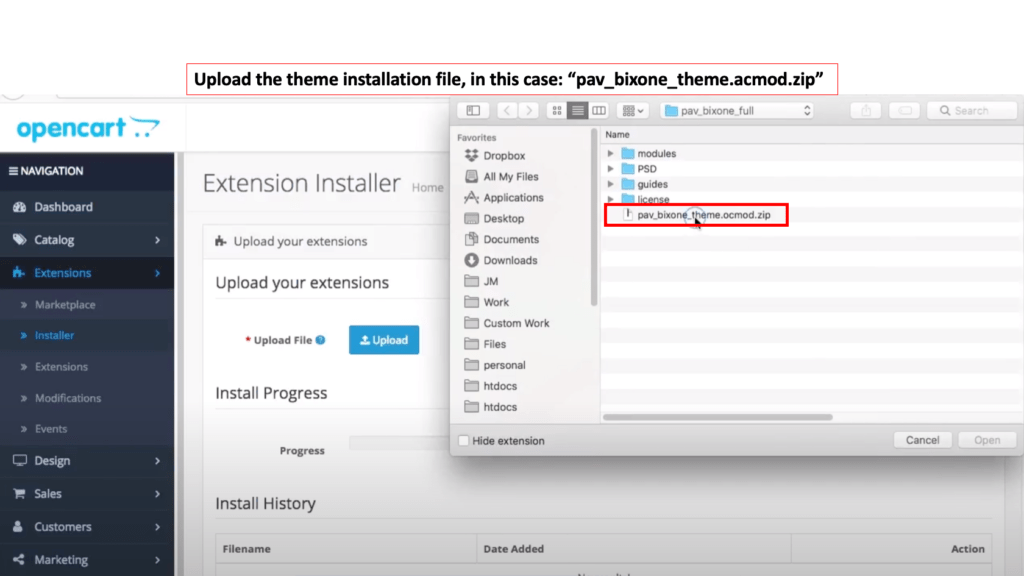
Go to Extensions > Installer > Upload

Upload the theme installation file, in this case: “pav_bixone_theme.acmod.zip”
After theme installation, you will see the message: “Success: You have modified extensions!

Access Extensions > Choose the extension type then filter themes and install the theme

Access Extensions > Choose the extension type then filter themes and install the theme

Set the Bixone theme as default and Enable it

Set the Bixone theme as default and Enable it

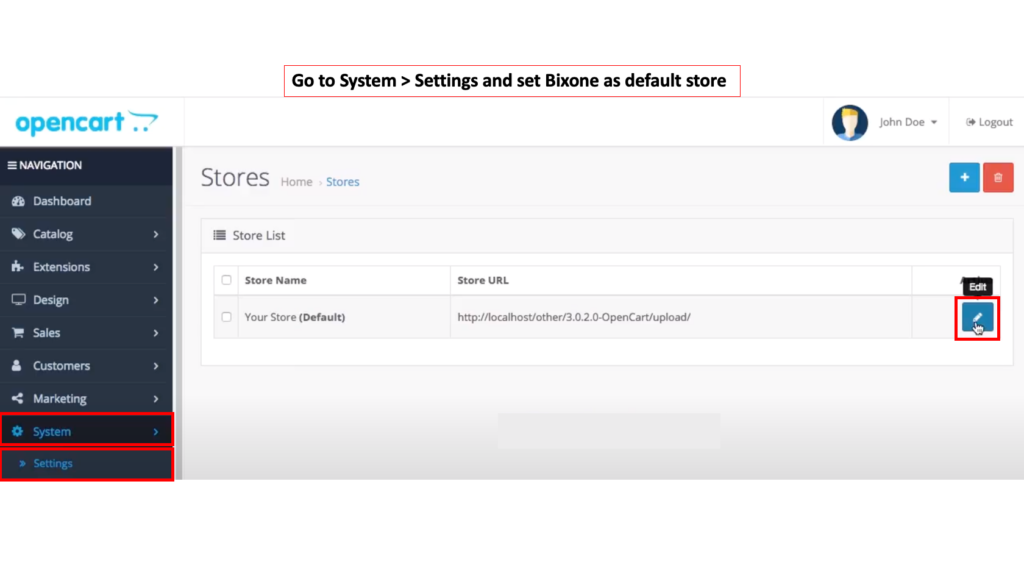
Go to System > Settings and set Bixone as the default store
Set Bixone as the default store and save it
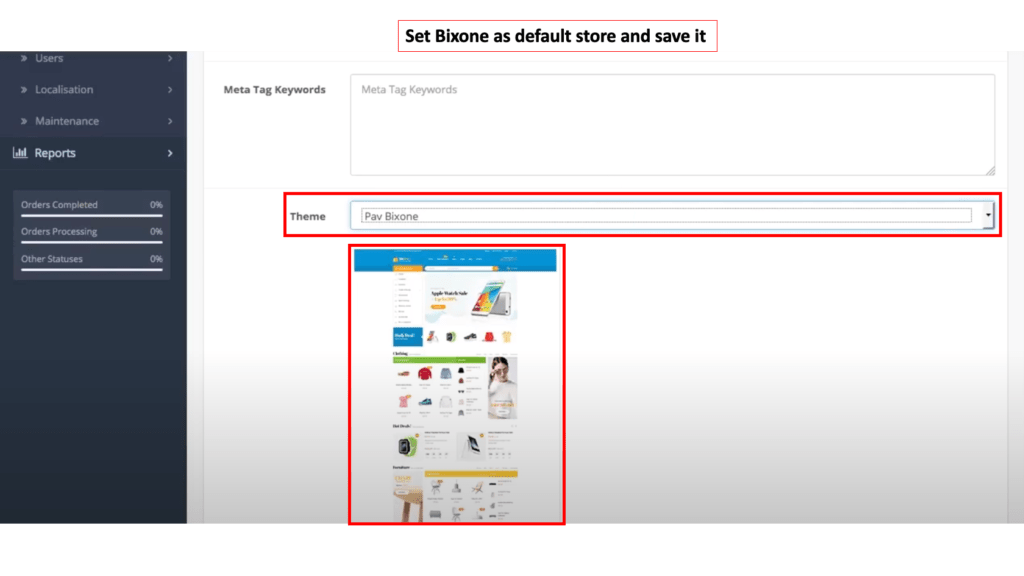
Set Bixone as the default store and save it

Go to Extensions > Modifications and Refresh modification to get all changes updated

INSTALL SAMPLE DATA TO GET THE SAME WEBSITE AS THE DEMO
Go to PavoThemer > Tools, This page lists all demos you can install

Hit the “Install” on the demo you want

Once the demo installation is finished, you need to refresh the modifications. When again go to Extensions > Modifications and Refresh modification to get all changes updated

Now check your website, you’ll get the same website as the demo you installed. The same procedure you can repeat to any other theme you want.

4 Additional useful information
CONNECTION OF E-STORES AND SUPPLIERS (To avoid the need to enter goods manually)
Sometimes suppliers have the option to import the goods into the e-shop automatically, you should ask the supplier of the goods. Often suppliers have solutions for the opencart store already made. In this case, your store will automatically receive from the supplier: photos, descriptions, and other necessary information about the goods. All you have to do is set fees and a profit. Every time suppliers update their product range, the goods in your store will be updated automatically.
E-SHOP LANGUAGES
The e-shop can be in another language such as: Spanish, Russian, or another language, translations are already done and are usually free. Languages already prepared:
E-SHOP DEMONSTRATION ON THE INTERNET
Here’s what the newly installed e-shop looks like on the server:
Here you can explore OpenCart e-store management:
RIGHT – PROTECTION OF PERSONAL DATA
When starting e-commerce, you need to think about personal data protection. Each country often has its own laws regarding the collection of personal data. E.g. the names, telephone numbers, and other information that people provide when purchasing goods and to whom the information or newsletters will be sent. There is nothing to be afraid of here, as it is often a fairly straightforward procedure to obtain permission to collect the necessary data.
The e-shop must have a “privacy policy”, “terms and conditions” and so on. This is information about the delivery of goods, problems, and the purposes for which the information is stored.
PROGRAMMING SERVICES
You really don’t need programming knowledge to install and configure Opencart, you can do it yourself. However, when specific needs arise, it may sometimes be necessary to hire a specialist, or a programmer, and adapt your individual solution to the e-shop. In this case, you can find relatively inexpensive specialists here:
You can also search for programmers in Facebook groups such as: “Developers” etc.
RECOMMENDATION
I do not recommend rushing to make a decision to install an e-shop. You have to feel if there is already such a need and if you are willing to do so. In my view, the decision to grow must be rational and balanced, along with a growing need.
ADDITIONAL RECOMMENDED SOLUTIONS FOR E-SHOP
- CUSTOMER ANALYSIS (Google Analytics)
- SSL CERTIFICATE
- SEARCH ENGINE OPTIMISATION (SEO)
- Newsletter for marketing campaigns
If you have any questions feel free to contact me.
